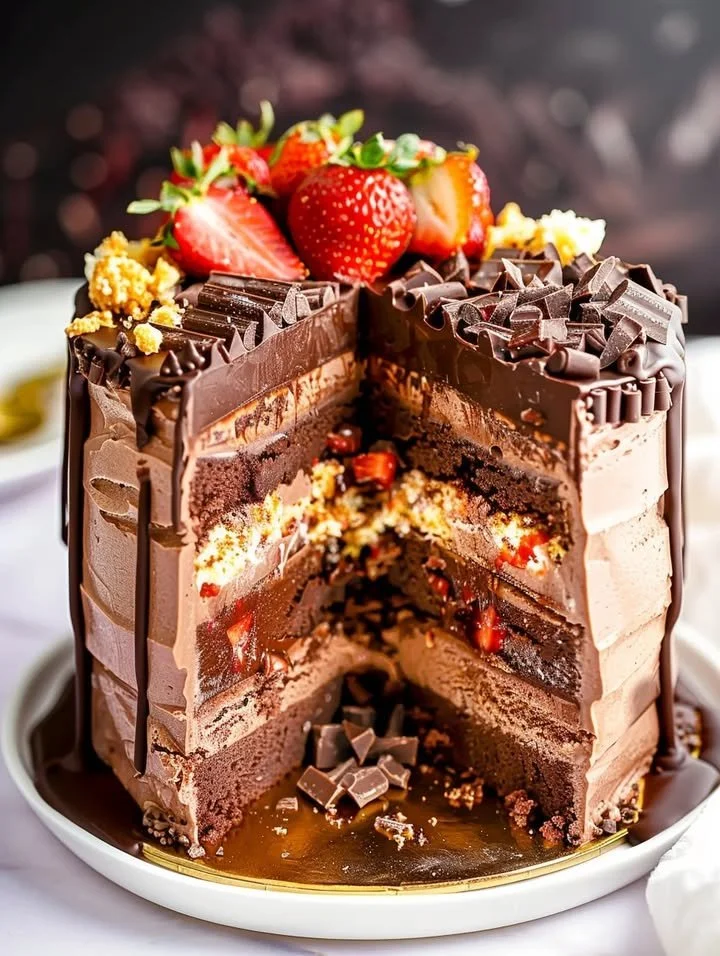
Chocolate Covered Strawberry Ice Cream Layer Cake
Chocolate Covered Strawberry Ice Cream Layer Cake is an indulgent dessert that combines the rich flavors of chocolate cake with the refreshing sweetness of strawberry ice cream. This delightful cake is perfect for any occasion, whether it’s a birthday celebration or a cozy family gathering. The layers of moist chocolate cake create the ideal backdrop for the luscious strawberry ice cream, while the smooth chocolate ganache adds a luxurious finish. With each bite, you’ll experience the harmonious blend of textures and flavors that will leave your taste buds dancing with delight. This is a dessert worth making, and I guarantee it will impress your guests!
Why You’ll Love This Recipe
This Chocolate Covered Strawberry Ice Cream Layer Cake is not only a feast for the eyes but also a treat for the palate. One of the key benefits of this recipe is its easy preparation. With minimal ingredients and straightforward steps, you won’t need to be a baking pro to create this decadent dessert. Plus, it’s family-friendly; kids will love helping out, especially when it comes to decorating with fresh strawberries and chocolate shavings.
Furthermore, this recipe balances the traditional and the modern, featuring classic chocolate cake paired with contemporary ice cream layers. It can easily be made ahead of time, making it an excellent choice for parties or potlucks. Whether you’re serving it on a hot summer day or making it a centerpiece for a winter gathering, this cake is bound to be a favorite.
Ingredients for Chocolate Covered Strawberry Ice Cream Layer Cake
- 2 cups all-purpose flour: The foundation of a soft, light cake.
- 2 cups granulated sugar: Adds sweetness and moisture.
- 3/4 cup unsweetened cocoa powder: For that rich chocolate flavor.
- 2 teaspoons baking powder: Helps the cake rise beautifully.
- 1 1/2 teaspoons baking soda: Works with baking powder for a fluffy texture.
- 1 teaspoon salt: Balances the sweetness.
- 1 cup buttermilk: Adds moisture and a slight tang.
- 1/2 cup vegetable oil: Keeps the cake tender and moist.
- 2 large eggs: Acts as a binder.
- 2 teaspoons vanilla extract: Enhances the cake’s flavor.
- 1 cup hot water: Creates a smooth, pourable batter.
- 1 quart strawberry ice cream, softened: The star of the show!
- 1 cup semi-sweet chocolate chips: To make the luscious ganache.
- 1/2 cup heavy cream: Adds richness to the chocolate topping.
- Fresh strawberries for decoration: Brightens up the cake and adds a burst of freshness.
- Chocolate shavings for decoration: Elevates the visual appeal.
Step-by-Step Directions
Preheat the Oven: Preheat your oven to 350°F (175°C). Grease and flour three 9-inch round cake pans to ensure easy removal after baking.
Make the Batter: In a large bowl, whisk together the flour, granulated sugar, cocoa powder, baking powder, baking soda, and salt. Add the buttermilk, vegetable oil, eggs, and vanilla extract. Mix until all ingredients are well combined. Finally, stir in the hot water until the batter is smooth and liquid.
Divide and Bake: Divide the batter equally among the prepared cake pans. Bake in the preheated oven for 30-35 minutes or until a toothpick inserted into the center comes out clean. Let the cakes cool in the pans for 10 minutes, then transfer them to a wire rack to cool completely.
Layer the Cake: Once the cakes are completely cooled, place one layer onto a serving plate. Spread a generous layer of softened strawberry ice cream evenly over the cake layer. Repeat this process with the second cake layer and remaining ice cream, then top with the final cake layer.
Make the Chocolate Ganache: In a microwave-safe bowl, combine the semi-sweet chocolate chips and heavy cream. Heat in 30-second intervals, stirring after each, until you achieve a smooth, glossy ganache. Allow it to cool slightly so it thickens a bit.
Decorate with Ganache: Pour the chocolate ganache over the top of the stacked cake, allowing it to drip down the sides for that enticing drizzle effect.
Add Toppings: Decorate the cake with fresh strawberries and chocolate shavings to create an eye-catching presentation.
Freeze and Serve: Finally, freeze the cake for at least 4 hours to allow the ice cream to set properly. Slice and serve!
Tips & Tricks
- Chef’s Secret: To enhance the chocolate flavor, consider adding a teaspoon of espresso powder to the dry ingredients.
- Optional Extras: For added texture, sprinkle crushed graham crackers in between layers with the ice cream.
- Storage Tip: Use parchment paper to separate layers if you plan to store the cake in the freezer. Simply wrap in plastic wrap after it has set.
- Decorating Tip: For an elegant touch, consider dusting the top with powdered sugar before serving.
Serving Suggestions & Pairings
This Chocolate Covered Strawberry Ice Cream Layer Cake is stunning on its own, but you can elevate the serving experience. Pair it with a scoop of extra strawberry ice cream or a dollop of whipped cream. A side of fresh fruit or a drizzle of chocolate sauce makes for an impressive presentation. If you’re feeling adventurous, serve it alongside a warm chocolate sauce for an indulgent hot-and-cold contrast.
Nutritional Information
Each slice of this Chocolate Covered Strawberry Ice Cream Layer Cake contains approximately 550 calories. While it is a decadent treat, it’s crucial to enjoy it in moderation. The combination of cake, ice cream, and chocolate offers a delightful indulgence that’s best savored.
Storing Tips & Variations for Chocolate Covered Strawberry Ice Cream Layer Cake
To store the cake, wrap it tightly in plastic wrap and keep it in the freezer. It can last up to 1 month stored this way. For healthier variations, consider using a lower-fat ice cream or substituting the oil with applesauce. If you want to experiment with flavors, use other fruits for the ice cream layer or try adding a layer of peanut butter between the cake and ice cream for an extra nutty twist.
Conclusion for Chocolate Covered Strawberry Ice Cream Layer Cake
Now that you have the inside scoop on how to create this Chocolate Covered Strawberry Ice Cream Layer Cake, it’s time to dive in and indulge! With its luscious layers and beautiful presentation, this cake will not only satisfy your sweet tooth but also become a family favorite. Be sure to try this recipe at your next gathering—you won’t regret it!
FAQs
1. Can I make this cake ahead of time?
Absolutely! The cake can be prepared up to a day in advance and kept in the freezer until you’re ready to serve.
2. How do I make the cake gluten-free?
You can use a gluten-free all-purpose flour blend in place of regular flour to make it gluten-free.
3. What if I don’t have buttermilk?
You can easily make a substitute by mixing 1 cup of milk with 1 tablespoon of vinegar or lemon juice. Let it sit for about 5 minutes before using.
4. Can I customize the cake for different flavors?
Certainly! You can swap out the strawberry ice cream for other flavors like vanilla or mint chocolate chip, or even incorporate flavored extracts into the cake batter.
5. How long will the leftover cake keep in the freezer?
If stored properly, the cake can last for up to a month in the freezer. Just make sure to wrap it well in plastic wrap to prevent freezer burn.
Chocolate Covered Strawberry Ice Cream Layer Cake
Ingredients
Cake Ingredients
- 2 cups all-purpose flour The foundation of a soft, light cake.
- 2 cups granulated sugar Adds sweetness and moisture.
- 3/4 cup unsweetened cocoa powder For that rich chocolate flavor.
- 2 teaspoons baking powder Helps the cake rise beautifully.
- 1 1/2 teaspoons baking soda Works with baking powder for a fluffy texture.
- 1 teaspoon salt Balances the sweetness.
- 1 cup buttermilk Adds moisture and a slight tang.
- 1/2 cup vegetable oil Keeps the cake tender and moist.
- 2 large eggs Acts as a binder.
- 2 teaspoons vanilla extract Enhances the cake's flavor.
- 1 cup hot water Creates a smooth, pourable batter.
Ice Cream and Toppings
- 1 quart strawberry ice cream Softened, the star of the show!
- 1 cup semi-sweet chocolate chips For the luscious ganache.
- 1/2 cup heavy cream Adds richness to the chocolate topping.
- Fresh strawberries for decoration Brightens up the cake and adds a burst of freshness.
- Chocolate shavings for decoration Elevates the visual appeal.
Instructions
Preparation
- Preheat your oven to 350°F (175°C). Grease and flour three 9-inch round cake pans.
- In a large bowl, whisk together the flour, sugar, cocoa powder, baking powder, baking soda, and salt.
- Add the buttermilk, vegetable oil, eggs, and vanilla extract. Mix until well combined.
- Stir in the hot water until the batter is smooth and liquid.
Baking
- Divide the batter equally among the prepared cake pans.
- Bake for 30-35 minutes or until a toothpick inserted comes out clean.
- Let the cakes cool in the pans for 10 minutes, then transfer to a wire rack to cool completely.
Assembly
- Place one cooled cake layer onto a serving plate. Spread a layer of softened strawberry ice cream evenly over it.
- Repeat with the second cake layer and remaining ice cream, then top with the final cake layer.
Ganache
- In a microwave-safe bowl, combine chocolate chips and heavy cream. Heat in 30-second intervals, stirring until smooth.
- Allow the ganache to cool slightly before pouring it over the top of the cake.
Decorating
- Decorate the cake with fresh strawberries and chocolate shavings.
- Freeze the cake for at least 4 hours before slicing and serving.